Practical Task - Fake Wounds
Initially, I decided to look for inspiration and guidance for the fake wounds. I searched Youtube to find the type of wound which I desired. This took a long time as not only was I very indecisive, but there were a large variety of fake wound tutorials, none of which perfectly fit my vision.
Finally I found the tutorial that I wanted:
I watched the video a number of times before deciding to attempt it. I noticed that the equipment they used wasn't available to me but I decided to challenge myself and improvise as much as I could with what I had to achieve the same effectiveness.
 Equipment List:


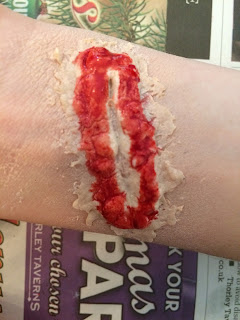


Finally, I added a few shards of glass into the wounds. The two pictures below are the final wound. The glass took a long time to set, so the wound cracked around the edges which made it look more unrealistic.


Finally I found the tutorial that I wanted:
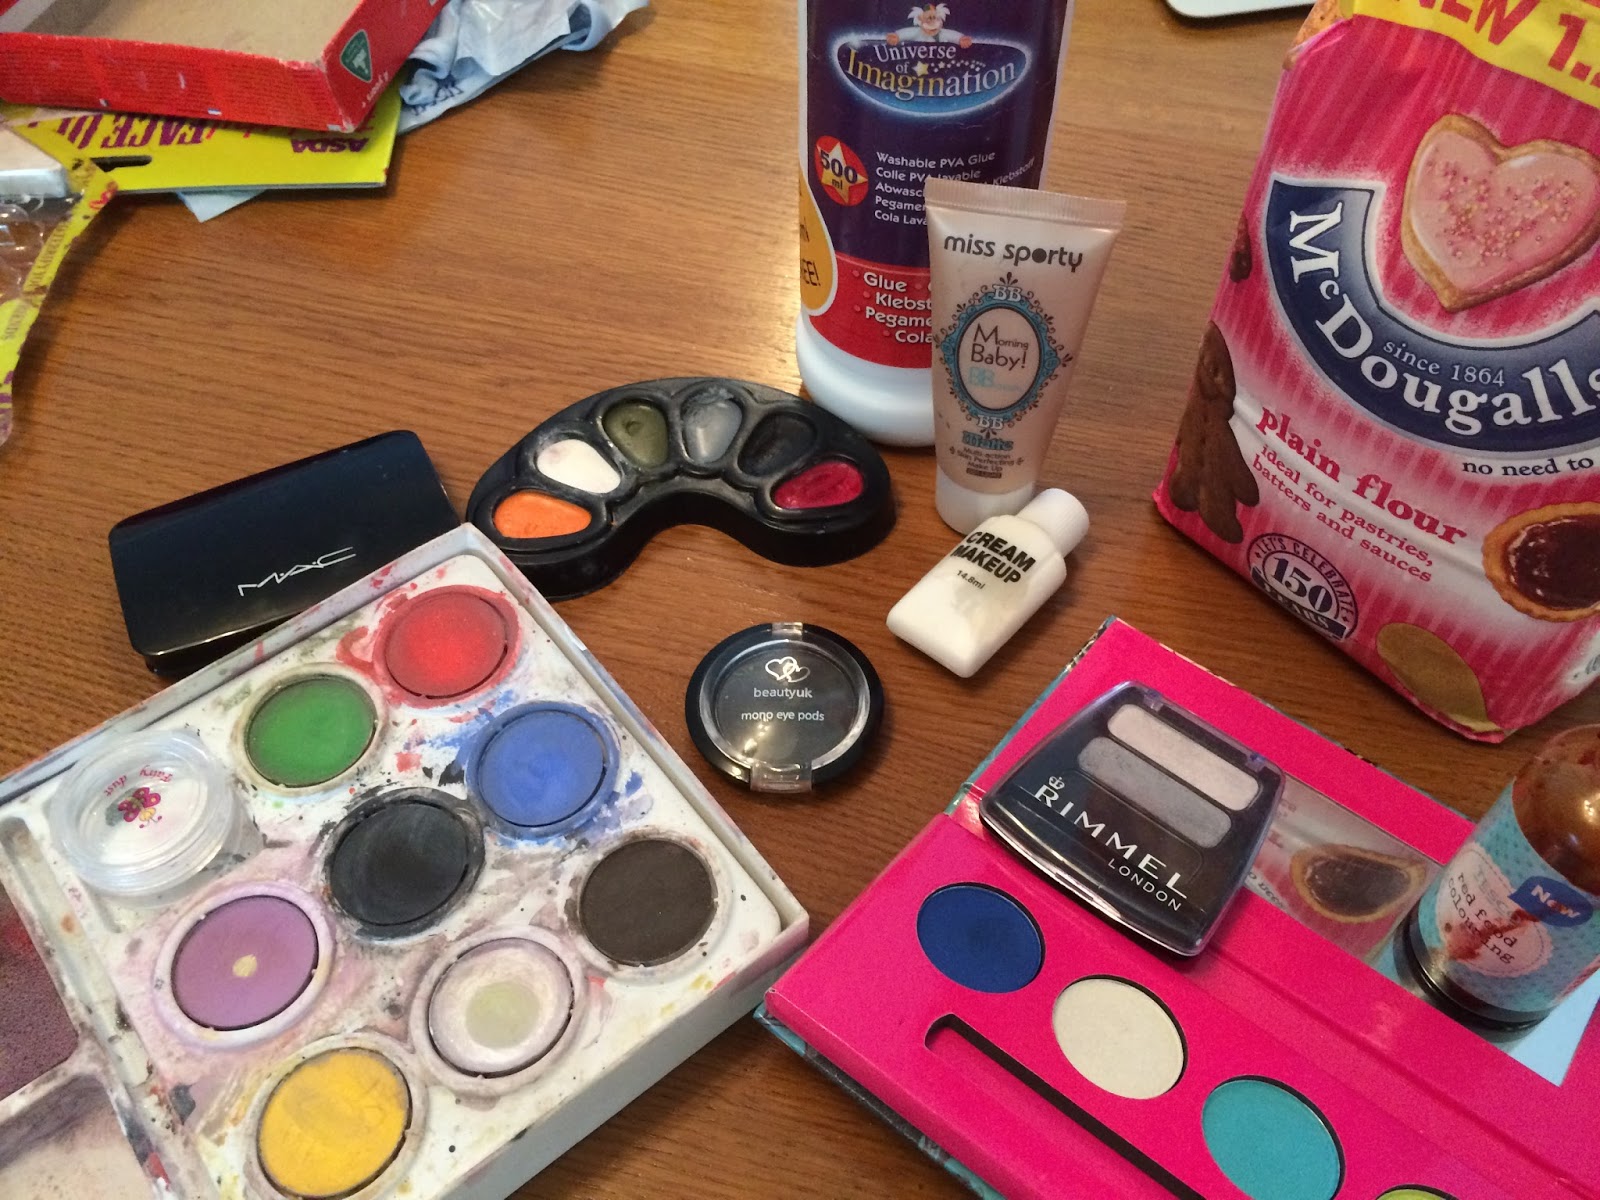
- Plain flour
- Water
- PVA glue
- Foundation
- Cream makeup
- Multiple eyeshadow pallets
- Face paint
- Red food colouring
- Variety of coloured makeup
The first step of the video, shows them using a special wax, used for fake wounds. Obviously this product wasn't available to me so I improvised. I initially attempted to create the same effect using Blu-Tack and PVA glue, this didn't work as the Blu-Tack was too hard and didn't stick to skin as well as I needed.
I then came up with the idea of making a paste from plain flour and water. I mixed together 2 tablespoons of flour with 1 tablespoon of water. This created a porridge like paste.

I then moulded the paste into the desired shape on the wrist and used the chopstick to make an indent down the middle. I also smoothed the edges in the attempt to blend the paste with the skin to make it look more believable.

Then, I covered the base of the wound in foundation, to further blend it with the skin. This stage was very fragile as the paste hadn't fully set and was still very soft and mouldable. I also reformed the indent down the middle with my finger to make it more like the wound in the video.

I then needed a blood like substance to spread onto the wound to look like fake blood. The video used actual fake blood but this was not available so I used some of the extra flour water paste and mixed it with red food colouring in order to achieve a blood like colour.

This was then spread onto the raised area of the wound using a thin paint brush. I did a few coats of the blood to achieve the overall colour that I wanted and tried to not make it too neat as this wouldn't look believable.

Next, I used a variety of eye shadow colours to represent bruising around the wound. I mainly used black but also added blue, yellow and white to add to the effect of the wound. I also used the remainder of the fake blood mixture to spread over the rest of the paint, adding different coats to different areas for textural effect. I then used the pallet of a variety of makeup colours, which was like a cream to put on the wound. I used black for the inside to add depth and then red to the edges. Then I used the black face paint add effect to the lower parts of the wound.

Using the same techniques for bruising, I added some more bruises to the arm to add to the overall effect of the wound. These were done with the eye shadow and cream like makeup in black and red.

I then needed to add glass into the wound, like they did in the video. Unfortunately I couldn't use real glass as this would've been dangerous and has potential to go wrong and cause harm. Instead, I came up with the idea to make my own glass, and so I found a sugar glass making tutorial on Youtube. This only needed a few ingredients so I decided to attempt it. I wouldn't add the food colouring though as I wanted it to represent real glass.
I gathered the two ingredients that I needed and measured out the right quantities. I didn't have the right corn syrup but did some research and found out that golden syrup would do the job.Unfortunately the one available was maple syrup so didn't have the see through glass look that I was aiming for, but I tried it anyway.

I followed the instructions on the tutorial, and so made the liquid and then poured it into a tin foil tray and then put it in the fridge. After about 30 minutes it still hadn't set so I put it into the freezer for about 10 minutes. As you can see, the maple syrup affected the appearance of the glass, meaning it didn't look the way I wanted it to look.

Then I smashed the sugar glass into shards and used PVA to glue them onto the wound. The glass was extremely sticky so it was a challenge to smash it into small enough pieces for the wound.


Evaluation
Looking back on what I did, there are a few things that I believe went well but also some things that I would improve on if I were to do it again.
I think that the improvisation for the lack of equipment worked well and the effectiveness of the wound wasn't diminished by this factor. Saying this, the fake blood would have worked better if it were shop bought, as it would have the right consistency and colour to be realistic. Also, the glass didn't work as well as I had hoped, the colour was wrong and it doesn't work effectively with the wound. The timings also affected the quality of the wound, as if I had prepared the sugar glass before the wound, I could have added it straight away and it wouldn't have the cracking effect it does in the last two pictures. Also, I think that the black bruising around the room is too dark and doesn't look realistic, as this injury wouldn't have bruising of that intensity.
Overall, I am pleased with what I have created and although there are areas for improvement, there are also a number of techniques that were done well and hopefully wounds like this can be used in our final coursework production.
No comments:
Post a Comment