Monday, 30 November 2015

Deconstruction- Titles of Films

Deconstruction- Titles of Films

The title of a film is so important. Everyone says 'don't judge a book by its cover' but if a film doesn't have a title that grips you when you first read it then the chances are you might not want to watch it. A title should grab the audiences attention and also give a clue as to what the film is going to be about, without giving away too much or revealing the plot of the film. 
An effective film title is usually short and snappy; you rarely come across film titles which are sentences or more than 5 words long. Different genres usually steer towards different trends of film names. For example, Horror often uses single words whereas a romcom may use a phrase which. Here are some film titles that I picked out to look at. 

'The Orphanage' is referring to one of the locations in the film. An orphan is usually related to abandonment and loneliness and so an orphanage is just a building or room in which all these children who have been left are living together; a collection of alone children and also the perfect place for a lot of vulnerable targets. Putting the 'The' before orphanage also makes it seem like it's the only one which puts it in solitude. 

'The Cell' is another example of a film following the two-word rule and again the first word is 'The'. Cell also could have two meanings; cell as in part of the body or cell as in a prison cell. This creates an enigma and leaves the title open to interpretation. Given the fact that it's a psychological horror, either concept could work. However the plot of this film is about a woman who's mind allows her to enter into the minds of others so the cells of the brain are intruded and the mind could also be thought of like a secluded prison cell in which this woman has entered. It's therefore down to the audience to watch the film to gain a further understanding and clarification as to the true meaning. 
'Honeymoon' follows the single world rule and it has connotations with weddings and love. Therefore because of its given genre (horror) the audience can immediately tell that there is going to be a juxtaposition between love and the horrible murders that undoubtedly occur. Generally honeymoons are quite an enjoyable time and the audience can tell that it's going to be completely ruined. 
I then looked at the opposite end of the spectrum; a romcom, 'How to Lose a Guy in 10 Days'. As mentioned before, romcoms often use phrases as titles instead of single words or short, snappy sentences. 'How to Lose a Guy in 10 Days' is very chic-flicky and straight away gives the audience an overall plot of the film and the events which may occur. It also sounds like an advice column which the narrative follows, again foreshadowing what is to come and giving the whole film a unique style. 


Saturday, 28 November 2015

Practical- Editing Experimenting

Practical- Editing Experimenting

I decided to practice editing techniques on Final Cut Pro. After having discussed the plot with the rest of TDAC, we decided to use flashbacks as part of our film opening. I wasn't quite sure how this would work so I decided to give it a go and have a practice. Firstly however I watched a couple of tutorials on Youtube to give me some ideas and inspiration and then I started my editing experimenting for flashbacks.

Firstly I needed some footage to work with so I used the shot of Charley that we had filmed for our GCSE Elastic Heart music video. She's looking at the camera, then looks down, and then looks back at the camera. It's very simple but I thought that it would be a gapped starting point for me to build a story around by including flashbacks as the shot looks like Charley is just thinking (dramatically). 

Then I came up with the concept of a flashback to a car crash where she loses someone she loves. I went onto Youtube and looked at different POV car crashes and chose one. I then put it into Final Cut and got rid a lot of the lead-up footage. Then I used the blade tool and interwound small snippets of the car crash footage into Charley's shot, which was the 'present' in my sequence. After watching it back, I felt like it was missing something so again I went onto Youtube and looked for POV shots of the passenger in a car looking at the driver, who was smiling and talking to the camera. It took a while but found a sing-along video of a man singing a song with different cars on the road. Although it was completely out of context, there were second-long shots in which were usable. 

I then wove some of these shots throughout which showed the love one who died (and the character Charley was having flashbacks about). The flickering flashbacks worked really well because it mirrored the pace of the car crash and then every time it jumps back to Charley's face which is completely still (I also but it into 25% slow motion), it creates a really effective juxtaposition between Charley and her memories. On Youtube I also found a car crash sound effect and I used the song 'Time' (which I obviously couldn't use on the real thing because of copy right, but for practicing editing I don't think it will be a big issue). I then layered up and timed the tracks perfectly with the footage and I added a filter called 'Burnt Sun' which just differentiated the present footage from the flashback footage. 

Then I just faded out the music and uploaded it to Youtube and here is the finished result:

Practical Task - Sound Creation

For my sound creation, I decided to experiment with Garageband to  create a creepy soundtrack or sound clip. 
I decided to initially search on YouTube for a tutorial on how to do this as well as inspiration for what I could attempt to create. Unfortunately this was unsuccessful as all the tutorials were either for the old version of Garageband or created on an iPad, but as I was using my mac the layout was completely different and confusing, so I decided to experiment and attempt to create an effective piece of sound.

The layout of Garageband was initially very daunting, as I was unsure how to navigate around the complex app. After taking some time to attempt to understand the program, I worked out how to add different instruments.

I then used the keyboard on my laptop to create the sound patterns. Again, I had to experiment by pressing different key combinations and listening to it repeatedly to decide which combination was the most effective.

The list of instrument options is below, and as I was unsure which sounds I wanted to use, I had to try each one out in different pitches and octaves to find which sounds worked well together. 

 I then had to play a sound and record it using the software. This then inserted it as a green bar (seen below) and then I was able to crop and adjust the positioning of it. Again, I had to keep listening to it in order to ensure it was in the correct place and sounded effective for our genre.


Although the sound clip is only 7 seconds long, it took me more than two hours to create it, partly because I was unfamiliar with the software and unsure of how I wanted it to sound.

My final sound piece is attached below. If I were to do it again, I would try to make a longer soundtrack and ensured that all the different instruments flowed well together.


Practical Task - Lighting

Lighting techniques have a huge impact on the quality of footage, and so I decided to experiment using different techniques in order to decide which will be best for our film opening.

Lighting can be used in many different ways and so can have a number of different effects including:
  • Controlling the mood of the scene
  • Directing the audience to look at something specific within the frame
  • Add texture or colour
  • Portray the characters in different ways e.g. sinister

I decided that the two techniques that I wanted to look at were High Key Lighting and Low Key Lighting. I also experimented with three point lighting (key, fill and back) to see the different effects that each have.

High Key Lighting
  • indicates a brightly lit scene
  • few shadows
  • usually provided by one source of light

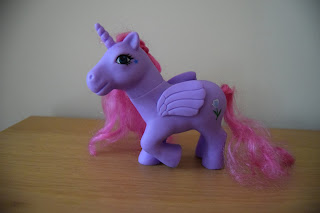
For my first attempt at high key lighting, I placed my object in front of a window and took the photo facing the source of natural light. This was effective at making the colours more vibrant and there is no presence of shadow.

I then used natural light from behind which made the colours look vibrant against the background and again, there are no shadows in this shot.

Rather than using natural sunlight like the above two shots, I used the artificial lighting in the room. This made the colours appear less vibrant and there are a few minor shadows in the shot.

Low Key Lighting
  • greyer and darker scale
  • large amount of shadow
  • high contrast between light and dark
  • key light is less bright and so does not dominate
First I placed my subject in a dark area and used the flash on my camera to illuminate the subject. This meant that it wasn't as effective although there is a high contrast between light and dark.

For this shot, I kept the subject in the same place but took the photo without using the flash. This dulled the colours but the camera lost quality because of the lack of lighting in the shot.

For this one I set up a key light on the right pointing directly towards the subject, meaning it was greatly illuminated. It also increased the amount of shadow in the shot and made the dark and light contrast greater.

I then experimented with the placement of the key lighting, and decided to put it above the subject aiming it directly in front of it. This increased the darkness in the shot and illuminated the subject, although some of it is darker due to the shadowed coverage.

Three Point Lighting


  • Key lighting is the main light in the shot, it is usually the strongest and therefore has the biggest influence.
  • Fill light is the secondary light and is placed on the opposite side to the key light, it is used to fill the shadows created by the key light.
  • Back light is placed behind the subject and lights it from the rear. Its purpose is to provide definition and subtle highlights.
Firstly I photographed the subject against a plain wall just using the flash. This made the colours more vibrant and added a glossy effect to the subject.

I then used a torch to create the key light on the right of the subject. I didn't use the flash as this would reverse the effects of the key light. The subjects colours are not as vibrant but there is a distinct shadow.

I then added a fill light on the opposite side of the key light, which added another shadow and therefore more depth to the subject. 

Then I added the backlight using a third torch. This added a third dimension to my subject and provided definition. The extra lighting also added vibrancy to the colours of my subject.

Overall, each of the different lighting techniques provided different effects in the frame, and so for our opening scene, a variety of different lighting techniques will need to be used to add depth and vibrancy to each shot. 


Practical- Typography

Practical- Typography


I started off by going onto a website called Typography Maker (http://typographymaker.com). The title we have chosen is 'Senseless' and so I typed it into the website in capital letters.


 I then chose a font that I thought would best suit our plot and story. This font (cinzel decorative) has serif lettering which is commonly used in psychological horrors or old films to represent an almost calligraphic way of writing. I particular liked the over-the-top flicks and extensions on the letters such as 'N' and 'L' and thought that this would allow me some leeway to add in extra motifs or images. I also changed the colour using the gradient slider to a slate grey because I thought that it would seem a bit more mysterious and in a way more bleak and dreary than just a solid black.
I then screenshot the image and inserted it into Adobe Photoshop.
Next I decided to stretch the text so it took up slightly less space horizontally i.e. it was shorter, and made the letters taller. I felt that this made the writing look more daunting and powerful because it was tall and overpowering.

Then I used the paint bucket tool to turn the background a lighter shade of grey so the writing sort of looked like it was an object amongst mist because it almost blended in with the grey background.
Then I found an image of a cartoon man who had been hanged. I used the 'magnetic lasso' tool to go round the edge of the figure and then I was able to delete the rest of the image so I was just left with the man and the rope.
Then I decided that the white figure didn't look quite right because it almost seemed too happy and it didn't fit in with the whole colour scheme, so again I used the paint bucket tool to turn him black so it looked like a silhouette and this worked much better and stood out because it was the only black item amongst all the grey.
I then decreased the size of the man and placed him between the first 'E' and the 'N', using the long flick on the 'N' to essentially attach the rope to so it looked as if he was being hanged from the letter. He also fit nicely between the letters.
Overall I was really pleased with the outcome of the typography. I particularly liked the addition of the added hung man because it foreshadows what's to come in the rest of the film and it's appropriate because we will be using black hung body bags in our opening scene. The only possible issue may be that the font could be said to look quite feminine, however I still think that this is a strong candidate for potential use in our opening scene.


Friday, 27 November 2015

Deconstruction - Camera Angles

For my deconstruction of camera angles, I wanted to specifically focus on a film within our genre, psychological horror, so decided to look at the trailer of Annabelle. In particular, I wanted to look at which camera angles were used, as well as how they are effective and some inspiration for the types of angles we could incorporate into our final film opening.


One of the first shots in the trailer is an establishing shot of the house. This is effective as it starts to highlight that the genre is psychological horror, as a convention of this is being set in a 'normal' neighbourhood. Also, showing the location in this way adds to the realism as the audience all have houses and so can relate.

Another shot that I liked was an extreme close up of the doll, Annabelle's face, in particular when the drop of blood falls onto her cheek and then drips into her eye. This shot has an eerie feel to it because the doll is generally associated with children, but also because the camera is so close to the doll, the inanimate expression is exaggerated.

I think this is also a very important shot in the opening, and is very effective. The use of the close up of two hands holding each other is comforting for the audience, as they are eased by the fact that the protagonist has someone who is in an attempt to look after her. The wedding ring can also be seen in this close up which highlights that the two are in love and married, again suggesting comfort and the feeling of safety. 
The long shot of the doll, Annabelle, in the bedroom is one of the best shots in the trailer. The mobile in the forefront of the shot, which is slightly out of focus, ensures the audience are aware of the presence of children in the family and the house. The focus is on the shelf, where multiple dolls are placed by the audience is immediately attracted to Annabelle, as she is the biggest doll. The use of a long shot enables the audience to see her face, without overly exaggerating her expression at this point in the trailer.

This shot is a close up of the dolls face, but as she only takes up a third of the frame, the audience are also able to see the room. The doll is also not face on to the camera, which suggests that she is staring at something else in the room. Although the camera focus is on the dolls porcelain face, the door begins to shut behind her and this means that the audience have to refocus on the door rather than her face, which can add tension to the scene. 

This shot is a low angle medium shot of a man carrying the doll through a dark street. The low lighting in the frame is effective as it means that the audience have to concentrate on what is in the shot, which adds tension as they don't know what is going to happen. Using a low angle shot also makes the audience feel inferior to the doll and the man, as the doll is towering over the camera and placing the audience into a position of fear.

Thursday, 26 November 2015

Deconstruction - Actors in a Slasher

All sub genres within the main horror genre, all include the main stereotypical characters (most of the time). These characters include: the slut, the black guy, the virgin, the non-believer, the hero, the hysterical one, the sexed up couple and finally, the killer.


Starting with the slut of the group, they will be typically be the one that irritates the audience the most. She will also be likely to be the female in the sexed up couple, but will also be trying to sleep with everyone else. The slut will usually be blonde, almost always chewing gum, will be wearing minimal clothing and most of all, she will be exceedingly loud and annoying to the audience and will escape death on several occasions to make sure that at least one person in the audience is close to scream "just kill her already".


Has there ever been a black guy in a horror film that has lasted more than 15 minutes? As far as my viewing of horror films has spread, not once have I seen the black character be the last to die until the end with one exception... A parody film called "Scary movie" where the black character, shorty, gets shot in the lung and even then, he tries to re-inhale the smoke he already had in his lungs from smoking marijuana. The fact that they feel the need to parody a black guy dying in a horror film by leaving him as the last main character to die helps to outline the initial point of the black guy always dies first.


The virgin, also possibly the hero of the sequence will be the last survivor and in the case of them being the hero as well, will be the one that eventually brings the killer down. They will typically be a religious as it has stuck all the way through the horror genre that people that have a religion will be saved by god and so they are also the purist character out of them all so will give the killer less of a reason to hunt them down which will indicate that they won't be killed or at least not until the end of the film when everyone else is dead.


The non-believer will usually be the one to die straight after the black guy. They're the one that laughs around and jokes about the killer. Even when confronted with the killer in Scream (1991), Tatum (non-believer) even asks ghost face if he'd like her to play the helpless victim and if he'd like to play the violent killer that nobody can escape from. After a few silent nods of the head to Tatum's questions, ghost face then goes for her by slicing her arm to prove it's not a joke and then eventually kills her by opening up the garage door she's stuck in and breaking her neck by lifting her head up to the roof.


The hero, as the name would suggest, is the one that will save everybody, or the remaining characters if there are any, from the murderer. They won't typically be the one that leads the group and tells everyone what to do. That person will die and the hero will be the one that everybody turns to for last resort of help.


The hysterical one, almost as irritating as the slut if they're separate characters in a particular instance, will be the one that won't stop crying. She'll usually be a survivor from the opening sequence if it involves a murder (which nearly every horror film has) and then for the rest of the film will refuse to go anywhere and will stay home with people keeping an eye open around her house for the killer. However, their 'guards' will be quickly killed, followed by the hysterical character  soon after. They will always be killed alone due to the group going off and looking for the killer which gives the killer a perfect chance to kill her, Or they're killed off one by one which eventually leads down to the hysterical one and the hero being left alive and they either need to triumph and both survive the inevitable bloody battle against the killer as the finale, or they both die a bloody, painful death.


The sexed up couple will be the ones that the audience will shout at a little more than the blonde slut. They will almost always be killed just before they have sex, or whilst they're having an intense make-out session in a parked car in the middle of nowhere. They won't take any notice of the killer even when he's inches away from them because they're too horny to notice anybody else until there's a knife plunged into their chest.


Last but not least, the killer. The killer will be typically masked as the audience shouldn't know who the killer is until the end of the film so as to keep the audience on edge, constantly trying to figure out which member of the group it is that is actually the killer which tends to be discovered within the last 10-15 minutes of the film to allow time for a gory finale.


Wednesday, 25 November 2015

Practical Task - Storyboard

Before drafting the storyboard, as a group we composed a basic plot summary.
The summary is as follows:

A girl is out jogging in a forest when she is grabbed by an unknown figure. She then wakes in the abandoned ruins of a castle to find her self tied up. Her captor is in the ruins too, and is wearing a black mask that covers half of his face. He is also wearing a hearing aid as he is deaf. He then approaches the girl and we see him raise his arm to strike her with a knife before the opening scene cuts to black and the titles appear. 

The first shot in the opening will be of the girl jogging through the forest. She is listening to music through her headphones, and is not panicked. 


After a few varied shots of the girl running we see a close up of her face looking shocked and scared as a hand grabs over her mouth.


Time has passed when she wakes up in the castle ruins. The first shot in the castle ruins will be a point of view shot from the perspective of the captured girl. We will use an elliptical fade in and out to create the effect of a drowsy eye opening and closing. 


We then see an extreme close up of the girl's eye, and we can see that it is bruised and that she is injured. 


We will then cut to an establishing shot of the castle, to determine more about the location in which the girl is trapped. A dark figure can be seen within the ruins, but only just.


We then see a close up of the whole of the girl's face and it is revealed that she has had her mouth duct-taped shut, and her eyes look very drowsy. 


A long shot of the girl kneeling with her back to the castle wall with her hands tied above her head is then seen. This further demonstrates how the girl is trapped and has no means of escape.


Mise-en-scene around the castle ruins will be shown in various shots to reveal information about the killer.


A high angle shot of the killer's table of weapons will be shown to build tension and create fear for the girl's life. 


The killer is then revealed through a close up of his face. Only his eyes are visible as the rest of his face is obscured by the mask.


The scene then flashes back to the killer's previous victims. These shots will be flashed quickly on screen to leave a lasting impact and to shock the viewer.


We then see an extreme close up of the killer's eyes and it can be seen through his eyes that he is smirking, indicating he is glad at the memories of his past murders. 


Another close up shot of the girl's face is shown, except that she now looks shocked and more scared.


We then see an extreme close up of the killer's hand reaching towards a sharp knife.


The final shot is of the killer raising the knife in his hand and slamming it down as the scene cuts to black and the titles appear. 


We plan to use sound within our film opening as a means of conveying the killer's disability. We will do this through using point of view shots from the perspective of the killer, and in these shots we will use no sound, and possibly even add an effect of a slight ringing silence whilst action occurs, in a form of contrapuntal sound.