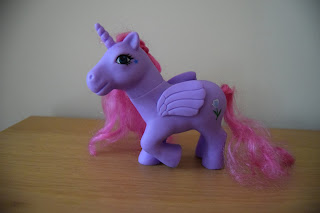
Lighting techniques have a huge impact on the quality of footage, and so I decided to experiment using different techniques in order to decide which will be best for our film opening.
Lighting can be used in many different ways and so can have a number of different effects including:
- Controlling the mood of the scene
- Directing the audience to look at something specific within the frame
- Add texture or colour
- Portray the characters in different ways e.g. sinister
I decided that the two techniques that I wanted to look at were High Key Lighting and Low Key Lighting. I also experimented with three point lighting (key, fill and back) to see the different effects that each have.
High Key Lighting
- indicates a brightly lit scene
- few shadows
- usually provided by one source of light
For my first attempt at high key lighting, I placed my object in front of a window and took the photo facing the source of natural light. This was effective at making the colours more vibrant and there is no presence of shadow.
I then used natural light from behind which made the colours look vibrant against the background and again, there are no shadows in this shot.
Rather than using natural sunlight like the above two shots, I used the artificial lighting in the room. This made the colours appear less vibrant and there are a few minor shadows in the shot.
Low Key Lighting
- greyer and darker scale
- large amount of shadow
- high contrast between light and dark
- key light is less bright and so does not dominate
First I placed my subject in a dark area and used the flash on my camera to illuminate the subject. This meant that it wasn't as effective although there is a high contrast between light and dark.
For this shot, I kept the subject in the same place but took the photo without using the flash. This dulled the colours but the camera lost quality because of the lack of lighting in the shot.
For this one I set up a key light on the right pointing directly towards the subject, meaning it was greatly illuminated. It also increased the amount of shadow in the shot and made the dark and light contrast greater.
I then experimented with the placement of the key lighting, and decided to put it above the subject aiming it directly in front of it. This increased the darkness in the shot and illuminated the subject, although some of it is darker due to the shadowed coverage.
Three Point Lighting
- Key lighting is the main light in the shot, it is usually the strongest and therefore has the biggest influence.
- Fill light is the secondary light and is placed on the opposite side to the key light, it is used to fill the shadows created by the key light.
- Back light is placed behind the subject and lights it from the rear. Its purpose is to provide definition and subtle highlights.
Firstly I photographed the subject against a plain wall just using the flash. This made the colours more vibrant and added a glossy effect to the subject.
I then used a torch to create the key light on the right of the subject. I didn't use the flash as this would reverse the effects of the key light. The subjects colours are not as vibrant but there is a distinct shadow.
I then added a fill light on the opposite side of the key light, which added another shadow and therefore more depth to the subject.
Then I added the backlight using a third torch. This added a third dimension to my subject and provided definition. The extra lighting also added vibrancy to the colours of my subject.
Overall, each of the different lighting techniques provided different effects in the frame, and so for our opening scene, a variety of different lighting techniques will need to be used to add depth and vibrancy to each shot.


No comments:
Post a Comment